
AeroPress coffee is a manual brewing method that uses air pressure to extract rich and flavorful coffee.
Yes, it looks odd, but the unique design has one-up traditional methods like drip, moka pot, and pour-over, delivering a strong, smooth, and sweet full-bodied flavor nearing espresso.
In this ultimate guide, we unveil the magic behind AeroPress, tracing its origins, sharing tempting recipes, and unraveling the art of crafting the perfect cup.
What Is AeroPress Coffee?
AeroPress Coffee takes the manual coffee brewing process to the next level. The setup features a piston-like mechanism with a chamber and plunger, capable of producing coffee that closely resembles espresso. The element of pressure makes all the difference.
It’s fairly easy and differs from methods like drip, filter, and moka pot brewing in the sense that it doesn’t demand meticulous attention to minute details such as pouring technique and blooming time.
While seemingly simple, the genius of AeroPress enables baristas to delve into creative recipes and techniques, unveiling the perfect cup of hot or cold brew. In fact, its impact is so profound that an annual competition known as the “World AeroPress Championship” aims to unearth the ultimate, flawless method for crafting AeroPress coffee.
The AeroPress is designed for brewing a single cup of robust and full-bodied coffee, making it a preferred choice for people on the go and campers.
What Is AeroPress Coffee Made Of?
AeroPress coffee employs the same basic ingredients as any other black coffee: coffee beans and hot water. The unique factor here is the pressure utilized for extraction, a feature absent from any other manual brewing method.
How Much Caffeine Is in An AeroPress Coffee?
According to the AeroPress official website, the beverage contains approximately 0.64 mg/ml of caffeine, translating to around 113.4 mg in a 6 oz cup of American-style AeroPress coffee. For comparison, a regular coffee of a similar cup size typically contains 71.2 mg of caffeine.
How Many Calories Are in AeroPress Coffee?
Plain AeroPress coffee, without any added ingredients, contains a negligible number of calories.
The History of AeroPress Coffee
The History of the AeroPress is a tale of genius and innovation brought to life by one man—Alan Adler. Remember the Aerobie disc from the 90s? It was all the rage back then. Well, this same Alan Adler invented it, along with many of your favorite sports toys.
A lecturer of engineering at prestigious universities and a passionate inventor, Alan found himself craving a strong and flavorful cup of coffee.
However, he wasn’t a fan of the traditional manual coffee brewers that churned out 4 to 6 cups at a time and offered limited control over variables like temperature, pressure, grind size, and brew time. Trying to brew just a single cup often resulted in weak and disappointing coffee.
So, he took matters into his own hands and began working on his own design in his garage. After some time, he emerged with a syringe-like device designed to brew concentrated coffee. In November 2005, at the Coffee Fest trade show in Seattle, Alan Adler unveiled his creation to the world. Little did he know that his invention would soon become a global sensation.
Who Invented AeroPress Coffee?
Alan Adler, an American inventor, made the first AeroPress coffee maker in his garage. Prior to that he designed world-class sports toys under the brand name Aerobie.
Where Is AeroPress Coffee From?
The AeroPress coffee maker was invented in Los Altos, California, USA, by physicist and engineer Alan Adler in 2005.
How To Make AeroPress Coffee — Two Super Easy Methods
The AeroPress is an incredibly versatile tool, with each person seeming to have their own perfect way of brewing coffee with it. Without delving into intricate details here, we’ll outline two methods you can use to brew the perfect AeroPress coffee at home or while camping.
Method 1: Classic AeroPress Method
This method is a classic, just the way Alan Adler, the AeroPress inventor, intended. We’re bringing it back to its roots.
Step 1: Understanding the AeroPress
Before we dive into the recipe, let’s take a quick moment to familiarize ourselves with the various parts of the AeroPress that you’ll be working with.
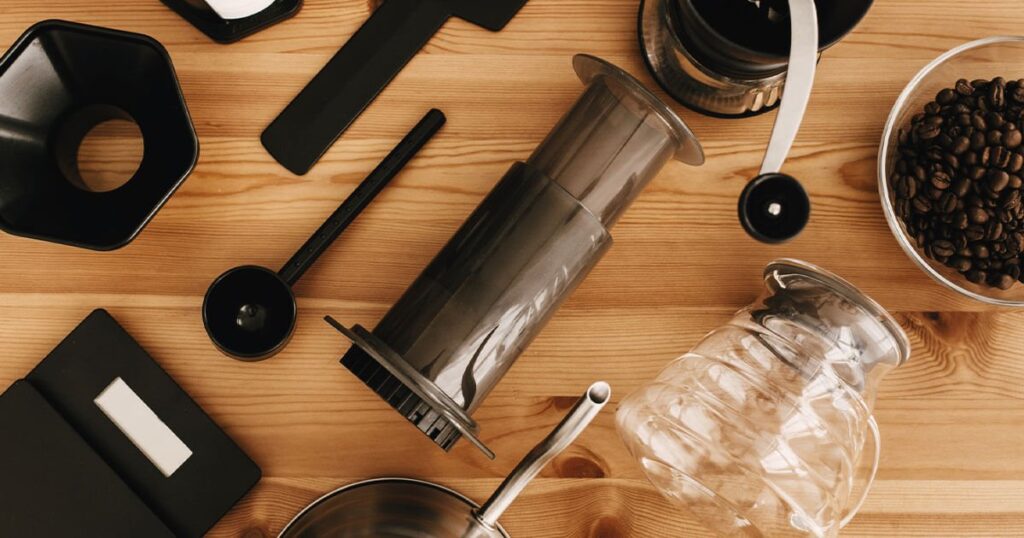
- Chamber: The main cylindrical body of the AeroPress where you place the coffee grounds and hot water.
- Plunger: The rubber plunger that fits inside the chamber and is used to create pressure for the brewing process.
- Filter Cap: This cap holds the filter paper in place and attaches to the bottom of the chamber.
- Filter Holder: A detachable piece that screws onto the bottom of the chamber and holds the filter in position.
- Filter Papers: Thin, circular paper filters that trap coffee grounds and produce a clean cup of coffee.
- Stirrer/Paddle: A plastic or metal stick to stir the coffee grounds and water together for even extraction.
- Scoop: A measuring tool to portion out the coffee grounds, typically holding around 15 grams.
- Funnel: An optional accessory that helps guide the coffee grounds into the chamber without spillage.
Step 2: Setting Up AeroPress
Always use freshly roasted coffee beans and grind them to a consistency between coarse and fine settings. When it comes to the roast, anything from light to dark works well.
Begin by disassembling all the components of your AeroPress. Start by placing filter paper inside the filter cap. No need to rinse it; you can use it as is. Attach it securely to the chamber.
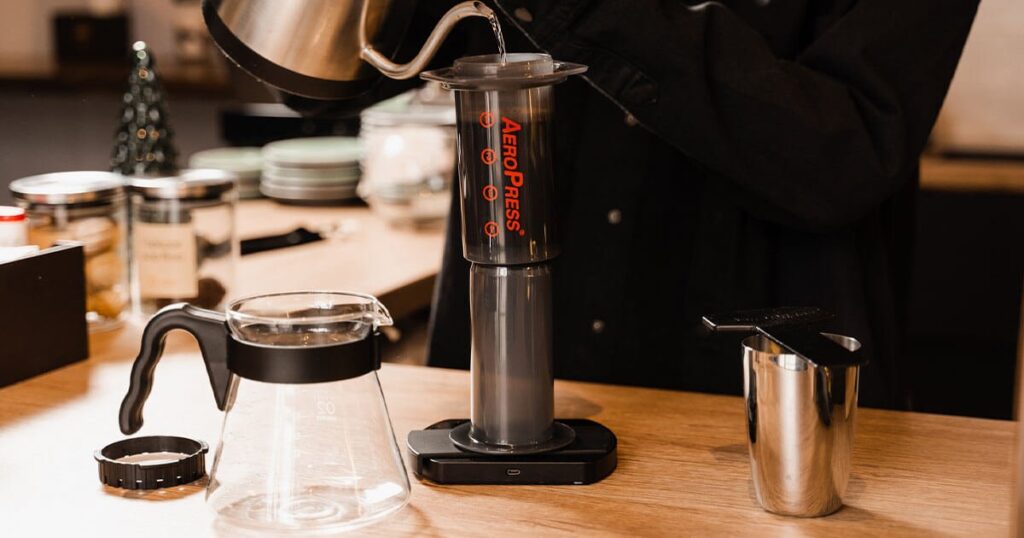
Position the assembled AeroPress on a sturdy cup. For our recipe, we’ll use light roast coffee. Take one scoop, which is approximately 15 g, and pour it into the chamber. Give it a few light taps to ensure even distribution of the coffee grounds.
Now, pour hot water slowly in a circular motion. It should just be below boiling point, around 90°C (194°F), in the chamber until it reaches the “1” marking, which represents approximately 30 milliliters (ml) of water.
Stir the mixture using the paddle.
Step 3: Place the Plunger
Next, insert the plunger and begin to press it downward slowly. Pause when you encounter resistance, then resume a few seconds later once the pressure eases. Continue pressing until fully depressed. This will yield an AeroPress coffee with an espresso-style concentration. For an Americano, simply add 3 oz (88 ml) of hot water to your desired strength.
Method 2: Inverted AeroPress Method
Perhaps you’ve noticed, in step two of the previous method, that as soon as you begin pouring water, it starts to drip into the cup. To prevent premature extraction baristas developed the inverted method. Here’s how you can do it.
Step 1: Place It Upside Down
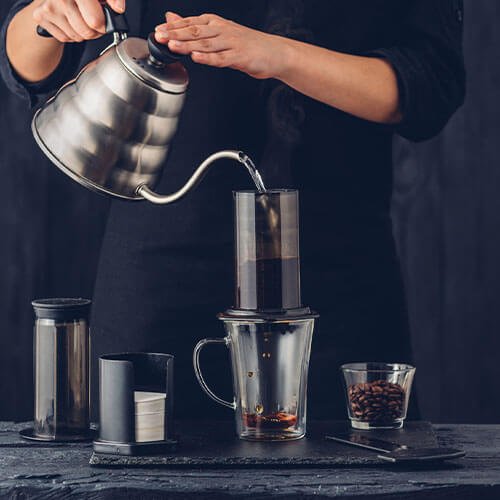
It’s quite simple: invert the AeroPress chamber with the plunger inside. Add 16 g, which is roughly one scoop of coffee grounds. Give it a gentle shake to ensure the even settling of the coffee grounds.
Pour hot water slowly in a circular motion, around 90°C (194°F), into the chamber until it reaches the “1” mark. Allow it to bloom for thirty seconds, then give it a gentle stir.
Step 2: Place the Filter Cap
Grab a filter and place it inside the cap, but this time dampen it slightly to help it stick to the surface. Now, attach the cap to the plunger.
Press the chamber down gently to expel excess air. As soon as you notice bubbles starting to rise, stop. Allow it to sit for an additional two minutes. This will extract more flavors and enrich the coffee.
Step 3: Invert AeroPress Coffee Maker
Position a sturdy cup upside down over the filter cap. Flip the entire apparatus and begin pressing the plunger as you typically would. Press gently and consistently without exerting excessive force. Press all the way down to the end, and you’ll be rewarded with a bold, espresso-style AeroPress coffee.
What’s Important in Making Good AeroPress Coffee?
The five things we consider most important for a good-tasting AeroPress coffee are as follows:
- Fresh Coffee Beans: Start with recently roasted, high-quality coffee beans to capture the best flavors and aromas.
- Grind Size: Use a consistent grind size, resembling table salt, for even extraction and balanced flavor.
- Brew Time: Follow precise brew times, including the crucial blooming phase, to control extraction and taste.
- Stirring: Gently stir the coffee and water mixture to ensure uniform saturation and extraction.
- Experimentation: Be open to adjusting variables like grind size, water temperature, and brew time to refine your preferred flavor profile.
Inverted AeroPress Coffee Recipe
Equipment
- AeroPress coffee maker kit
- Filter Paper
- Sturdy cup
Ingredients
- 16 g (approx. one scoop) coffee grounds
- Hot water (around 90°C/194°F)
Instructions
- Invert the AeroPress chamber with the plunger inside. Add 16g of coffee grounds and shake for even settling.
- Pour hot water into the chamber until it reaches the “1” mark. Allow coffee to bloom for 30 seconds, then gently stir.
- Dampen a filter, place it in the cap, and attach the cap to the plunger.
- Gently press the chamber down to expel excess air. Pause when bubbles start rising, and let it sit for 2 minutes.
- Place a sturdy cup upside down on the filter cap. Flip the AeroPress and press the plunger evenly to the end.
Who Is AeroPress Coffee Recommended For?
AeroPress coffee is suitable for everyone, from on-the-go individuals to campers, thanks to its convenient, portable, and versatile brewing method. Nevertheless, its single-serving nature might not make it the most time-efficient choice for larger groups.
What Is the Difference Between AeroPress Coffee and French Press?
While both offer manual coffee brewing, they differ in brewing methods, grind size, brew time, flavor, serving size, and portability. See the table below for a detailed comparison:
| Aspect | AeroPress | French Press |
| Brewing Process | Air pressure, quick and clean | Steeping, full-bodied |
| Grind Size | Medium-fine to medium | Coarse |
| Brew Time | 1-2 minutes | 4-5 minutes |
| Body and Flavor | Cleaner, versatile flavors | Full-bodied, bold |
| Serving Size | Single cup | Multiple cups |
| Portability | Compact and lightweight | Bulkier, less portable |
Choose based on your taste preference, convenience, and brewing style.
Frequently Asked Questions
Why Is AeroPress Coffee So Good?
AeroPress coffee's unique pressure-driven extraction process contributes to a richer flavor profile, resembling espresso, by emphasizing aromatic oils and intensifying taste, setting it apart from traditional brewing methods. Many coffee shops also offer AeroPress coffee owing to its popularity and amazing taste.
Is The AeroPress Coffee Maker Any Good?
Absolutely, AeroPress is a favorite among coffee lovers worldwide for its great coffee, quick brewing, and versatility. It enhances flavors, offers a smooth cup, and is budget-friendly with durable construction for lasting value.
What Coffee to Use in AeroPress?
For AeroPress, choose freshly roasted whole coffee beans and grind them to a medium-fine consistency. Experiment with different roasts to find the flavor profile you prefer.
Does AeroPress Taste Better Than French Press?
Both AeroPress and French press offer distinct flavor profiles. AeroPress tends to yield a cleaner and smoother cup, making it well-suited for single servings. In contrast, French press offers a fuller-bodied brew with more oils and sediment. Taste preference varies; try both to determine your favorite.
Do You Need a Special Cup for AeroPress?
No, a special cup is not required for AeroPress. Any sturdy cup or mug that can hold the brewed coffee will work well.
Why Is AeroPress So Popular?
AeroPress delivers a potent, sweeter coffee akin to espresso with minimal effort. Its controlled extraction process highlights rich notes, perfect for those desiring a robust yet accessible brew. Additionally, its portability and economical price further contribute to its widespread popularity among coffee drinkers.
Do You Get Crema with AeroPress?
Yes, you can get crema with AeroPress, particularly when using finer grind settings and a shorter brew time. The pressure-based extraction can create a layer of crema on top of the coffee.
How Much Water Do You Need For 1 Cup AeroPress?
For a standard 1-cup AeroPress, you typically use around 200 to 250 milliliters (6.7 to 8.5 ounces) of water. Adjust the amount based on your desired coffee strength and brewing method.
How Much Coffee Do You Use For 1 Cup AeroPress?
A standard one-heaping scoop provided with the AeroPress package holds around 15 grams of coffee grounds, which is suitable for brewing a standard 1-cup serving. Adjust as needed for personal taste preferences.
Do You Use Ground Coffee Beans with AeroPress?
Yes, you use ground coffee beans with AeroPress. However, it's recommended to avoid pre-ground beans. Grinding your beans just before brewing ensures maximum freshness and flavor. Pre-ground beans may have lost some of their aroma and oils, impacting the overall quality of your coffee.
Final Thoughts
To sum up, AeroPress brings a fresh approach to coffee-making, offering bold, smooth flavors akin to espresso, all without the need for expensive coffee makers. Even if you usually stick to traditional methods, give our AeroPress recipe a try – it could change your coffee game. Have fun experimenting with different grind sizes, brewing times, and water temperatures to discover a world of unique flavors and aromas. Elevate your coffee skills one sip at a time.